
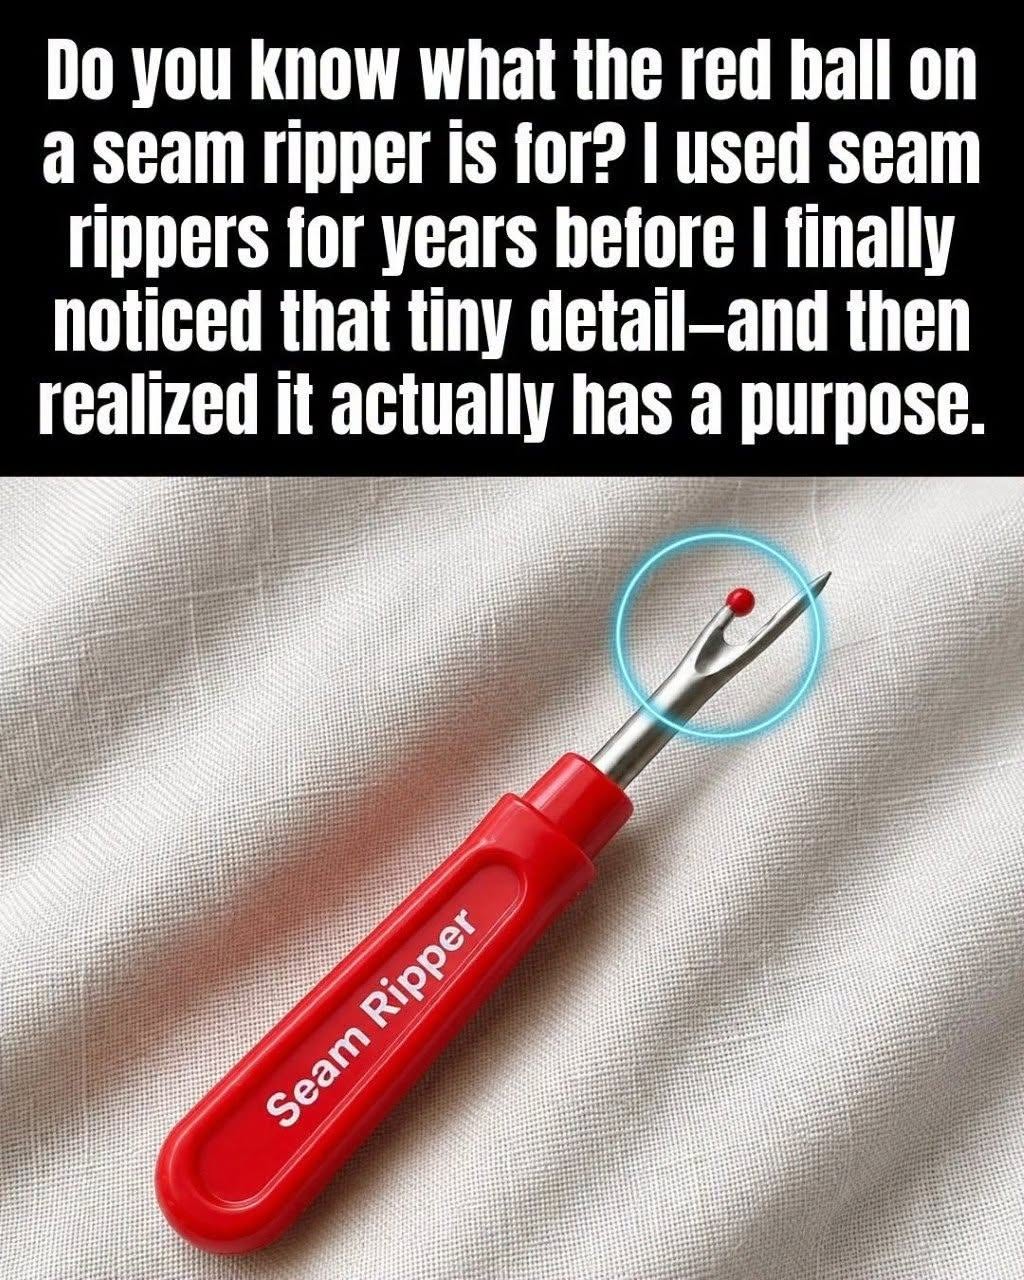
If you’ve ever made a sewing mistake and thought, Well… I guess that stitch is staying there forever, let me introduce you to one of the smallest and most useful tools in your sewing kit: the seam ripper.
It may look simple, but this little tool can save a project when you need to remove stitches cleanly without damaging the fabric.
And once you know how to use a seam ripper properly, you’ll wonder how you ever sewed without one!
Whether you’re fixing a crooked seam, removing a line of stitching, adjusting a garment, or simply trying to undo a mistake, learning the right technique makes the job much easier.
The secret isn’t rushing.
It’s letting the sharp part of the seam ripper do the work while keeping the fabric protected.
ADVERTISEMENT
What Is a Seam Ripper?
A seam ripper is a small sewing tool designed specifically for cutting and removing stitches.
Most seam rippers have:
- A pointed end
- A sharp inner cutting edge
- A small rounded tip or protective ball on one side
- A handle for better control
That simple design allows you to slide the tool underneath a thread and cut it without needing to pull aggressively on the fabric.
The protective tip is especially useful because it helps guide the tool between stitches or fabric layers.
And that tiny little hook-shaped blade?
That’s the part that gets the job done.
Why Use a Seam Ripper Instead of Scissors?
You might be wondering:
Can’t I just use my sewing scissors?
Technically, you can sometimes cut individual threads with small scissors.
But a seam ripper gives you much more control.
It’s narrow enough to get between stitches and layers of fabric, making it easier to remove unwanted stitching while reducing the chance of accidentally cutting the fabric itself.
That’s especially important when you’re working with delicate, expensive, tightly woven, or difficult-to-replace material.
Scissors are designed to cut.
A seam ripper is designed to remove stitches.
There’s a difference.How Does a Seam Ripper Work?
The basic idea is wonderfully simple.
You use the pointed end to get underneath a stitch.
Then you position the thread against the sharp inner edge.
A gentle movement cuts the thread.
Once several stitches have been cut, you can pull away the loosened thread and remove the remaining pieces.
You’re essentially breaking the stitching one thread at a time rather than trying to force the entire seam apart.
And that is exactly why patience matters.
How to Properly Use a Seam Ripper
Ready to give it a try?
Here’s the technique I recommend.Step 1: Lay the Fabric Flat
Start by placing your fabric on a clean, flat surface.
You want the stitching to be easy to see and access.
If the fabric is bunched up, folded, or stretched tightly, it’s much easier to accidentally catch the fabric with the seam ripper.
ADVERTISEMENT
For larger garments, work on a table or another stable surface rather than trying to remove stitches while holding the fabric in your lap.
Step 2: Identify the Stitches You Need to Remove
Take a moment to look carefully at the seam.
Don’t start cutting until you’re certain which stitches need to come out.
If you’re removing a short section, it’s usually best to work only on that area rather than cutting the entire seam apart.
A little planning can save you a lot of repair work later!
Step 3: Slide the Point Under One Stitch
Hold the seam ripper comfortably in your hand.
Gently slide the pointed end underneath a stitch.
You don’t need to push deeply.
The goal is simply to get the thread positioned against the cutting edge.
ADVERTISEMENT
Keep the fabric relaxed underneath the stitch.
Step 4: Cut the Thread
Once the thread is resting against the sharp inner edge, use a small, controlled motion to cut it.
You don’t need to force it.
The blade is sharp specifically so that a small amount of pressure should be enough.
This is where many beginners make the mistake of trying to use the seam ripper like a knife.
Don’t.
A seam ripper isn’t something you need to saw back and forth.
Let the blade do the work.
Step 5: Skip a Few Stitches
If you’re removing a longer line of stitching, you don’t necessarily have to cut every single stitch individually.
After you’ve opened a few stitches, you can often gently pull the seam apart and expose more of the thread.
Then continue cutting selected stitches.
This can make removing a long seam much faster.
Just don’t pull hard.
If the thread doesn’t release easily, stop and cut another stitch.
Step 6: Turn the Fabric Over When Helpful
Sometimes the easiest way to remove stitches is from the opposite side.
If you’re struggling to see the thread clearly, turn the fabric over and inspect the stitching from the other direction.
You may find that the thread is easier to access or that the seam opens more cleanly from that side.
Step 7: Remove the Loose Threads
Once the stitches are cut, gently pull the loose thread away.
A pair of tweezers can be helpful for tiny thread pieces that are difficult to grab with your fingers.
Avoid yanking.
If a thread is still attached, there’s probably another stitch holding it in place.
Find the remaining stitch and cut it instead of forcing the thread out.
Step 8: Check the Fabric
After removing the stitches, inspect the fabric carefully.
Look for:
Snagged threads
Small holes
Pulled fibers
Remaining thread pieces
Any accidental cuts
If everything looks good, you’re ready to restitch, reposition, or repair the seam.
The Safest Way to Use a Seam Ripper
There’s one simple principle worth remembering:
Cut the thread, not the fabric.
It sounds obvious, but it’s easy to forget when you’re working quickly.
Keep the seam ripper at a shallow angle and avoid pushing the sharp point deep into the material.
For delicate fabrics, go especially slowly.
Silk, satin, lightweight cotton, fine knits, and other easily damaged fabrics deserve extra care.
Use the Rounded Tip Wisely
Many seam rippers have a rounded protective ball on one side of the cutting area.
That little ball isn’t decorative.
It can help keep the sharp edge from digging directly into the fabric as you slide the tool beneath a stitch.
Whenever possible, position the seam ripper so the protective side is between the blade and the fabric.
Should You Cut Every Stitch?
Not necessarily.
For a short section of stitching, cutting individual stitches may be the easiest approach.
For a long seam, however, you can often cut several stitches at intervals and then gently pull the seam apart.
The loose thread can then be removed more easily.
Just remember that the fabric should separate with very little resistance.
If you have to tug hard, stop.
Cut a few more stitches instead.
What If You Accidentally Cut the Fabric?
First, don’t panic.
It happens.
Even experienced sewers occasionally catch a fabric thread when removing stitches.
If you’ve made a tiny nick, stop working on the area and inspect the damage before continuing.
Depending on the fabric and location, the repair may be as simple as securing a loose thread or carefully restitching the area.
But don’t keep ripping stitches while hoping the problem will disappear.
You could make the opening larger.
For valuable garments or delicate fabrics, consider getting professional repair advice rather than experimenting with further cutting.
Common Seam Ripper Mistakes to Avoid
A seam ripper is simple to use, but a few habits can make it much safer and more effective.
Don’t Rush
This is probably the biggest one.
When you’ve sewn an entire seam incorrectly, it’s tempting to tear it out as quickly as possible.
Unfortunately, rushing is when accidental fabric cuts are most likely to happen.
Slow down.
Your future self will thank you.
Don’t Pull Hard on the Thread
If a thread won’t come loose, don’t force it.
There’s probably another stitch holding it in place.
Cut the thread instead.
Don’t Push the Point Too Deep
The point is there to get underneath the thread—not to dig through the fabric.
Use only as much pressure as necessary.
Don’t Use a Dull Seam Ripper
A dull blade can actually make the job harder because you may start applying more pressure.
A sharp, clean seam ripper should cut thread with relatively little effort.
Don’t Work on Stretched Fabric
Stretching the fabric can change the position of the stitches and make it easier to catch the material.
Whenever possible, let the fabric lie naturally while you’re removing the stitches.
How to Remove a Long Seam Quickly
If you’re removing a long line of stitching, there’s a handy technique that can save considerable time.
Start by cutting every few stitches along the seam.
Then gently pull the two pieces of fabric apart.
The thread should begin loosening.
You can then pull the longer sections of thread away and use the seam ripper to deal with any stubborn stitches that remain.
This method is particularly useful when you’re removing basting stitches or opening a seam that needs to be altered.
The key word is gently.
If the fabric resists, stop pulling and cut more stitches.
How to Use a Seam Ripper on a Hem
Hems can be a little trickier because you may have multiple layers of fabric.
Start at one end of the section you want to open.
Carefully slide the seam ripper underneath a visible stitch and cut it.
Continue along the hem, working in small sections.
Once enough stitches are removed, gently unfold the hem.
If you see adhesive, interfacing, or another layer underneath, slow down even more so you don’t accidentally damage the material.
How to Remove a Zipper Seam
Zippers require extra caution because you’re working close to both fabric and hardware.
Open the garment or item so you can clearly see the stitching.
Work on one stitch at a time, keeping the seam ripper pointed toward the thread rather than toward the zipper tape or fabric.
If the zipper itself is being replaced, removing the stitching gradually is much safer than trying to pull the zipper free.
Can You Use a Seam Ripper on Delicate Fabric?
Yes, but delicate fabric requires extra care.
Before removing stitches from silk, chiffon, satin, lace, or another fragile material, consider testing your technique on an inconspicuous area or scrap piece of the same fabric if one is available.
Use very light pressure.
Avoid dragging the blade across the fabric.
And remember: sometimes the holes left behind by old stitches can remain visible even after the thread has been removed.
That’s not necessarily damage caused by the seam ripper.
The fabric may simply retain the marks created by the original stitching.
What Can You Use Instead of a Seam Ripper?
If you don’t have a seam ripper, small embroidery scissors or very fine thread snips can sometimes be used to remove individual stitches.
However, you need to be especially careful.
Regular scissors are usually much harder to maneuver underneath a stitch without catching the fabric.
For anyone who sews regularly, a seam ripper is inexpensive, compact, and worth keeping in your sewing kit.
Honestly, it’s one of those tools you don’t appreciate until you desperately need it!
How to Maintain Your Seam Ripper
A seam ripper doesn’t require much maintenance.
Keep the blade clean and dry, and store it somewhere where the sharp point won’t get damaged.
Don’t use it for cutting things it wasn’t designed to cut.
And if the cutting edge becomes noticeably dull or damaged, replace the tool rather than trying to compensate by applying more pressure.
A seam ripper is small enough that having a spare isn’t a bad idea either.
Frequently Asked Questions
What is the correct way to use a seam ripper?
Slide the pointed end carefully underneath a stitch and position the thread against the seam ripper’s sharp inner edge. Use a small, controlled movement to cut the thread, then remove the loosened thread gently.
Which side of a seam ripper should touch the fabric?
The rounded protective side should generally be positioned between the cutting edge and the fabric when possible. This helps reduce the chance of the blade catching the material.
Can a seam ripper cut fabric?
Yes. A seam ripper is sharp enough to cut fabric if it is pushed or pulled against the material. That’s why controlled movements and shallow positioning are important.
How do I remove stitches without damaging fabric?
Work slowly, keep the fabric flat, cut individual stitches or small groups of stitches, and avoid pulling hard on thread that hasn’t been fully cut.
Why does my seam ripper keep snagging the fabric?
You may be pushing the tool too deeply, using too much pressure, or approaching the stitch from an awkward angle. Try a shallower angle and smaller movements.
Can I use a seam ripper on a sewing machine seam?
Yes. A seam ripper is commonly used to remove stitches created by a sewing machine. Work carefully because machine stitching can be dense and tightly secured.
Do I need to cut every stitch?
No. For longer seams, you can often cut stitches at intervals and gently separate the fabric, then remove the remaining thread. Don’t force the fabric apart if it doesn’t release easily.
What should I do if I accidentally make a hole?
Stop and assess the damage before continuing. A small nick may be repairable, but repeatedly pulling or cutting can make the opening larger. Delicate or valuable garments may be best handled by a professional.
Is a seam ripper better than scissors?
For removing stitches, usually yes. Its narrow shape and specialized cutting edge give you much more control around individual threads.
A Few Final Tips for Using a Seam Ripper
If you’re new to sewing, remember these simple rules:
Keep the fabric flat.
Work in good lighting.
Start with one stitch.
Use light pressure.
Let the blade cut the thread.
Don’t force stuck threads.
Use the protective tip whenever possible.
Turn the fabric over if you can’t clearly see the stitches.
Take extra care with delicate materials.
Check your work frequently.
And perhaps the most important tip of all:
There’s no prize for removing stitches the fastest.
Taking an extra few minutes is far better than accidentally cutting a hole in the garment you were trying to save.
The Bottom Line
A seam ripper may be one of the tiniest tools in your sewing box, but it’s incredibly useful.
Once you understand how to position it, how to cut individual stitches, and how to protect the fabric underneath, removing sewing mistakes becomes much less intimidating.
The trick is simple: slow down, keep the fabric flat, and let the seam ripper’s blade do the work.
Whether you’re fixing a crooked seam, shortening a hem, replacing a zipper, or undoing a sewing mistake, this little tool can save you a tremendous amount of frustration.
And the next time you look at a seam and think, Oh no… I have to take all of that out, don’t panic.
Grab your seam ripper.
Take a breath.
And remember—one stitch at a time!
